

One of the first things you probably want to do once you get started with ZeyOS is setting up form fields for your various business object. In this post you will learn how to
- add new form fields
- use iXML to define conditions to change the layout and behaviour of your form
- display new form fields as column in your list views
Let's get started!
Adding a form field
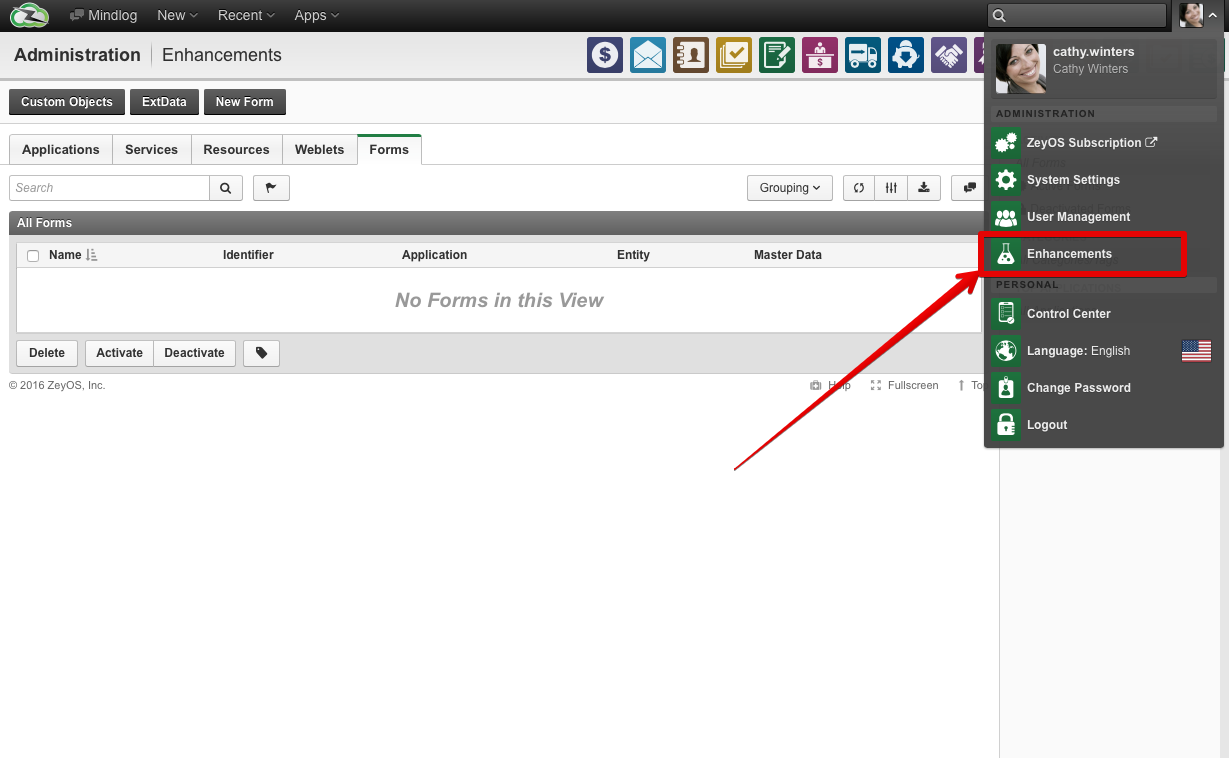
If you haven't already, get the ZeyOS SDK, it makes working with ZeyOS far more convenient since it features code assist and various other features. Read our post "ZeyOS SDK Introduction" for more details. In this article, we will setup form fields in the browser. To do this, open the system settings and head over to "Forms" and add a new form.
Give your new form a name and select the entity for which the new form should be added. Next, you have two more display options:
- Master data: This means, that the form fields will be displayed as part of the "master data" section of your form
- Expanded/Collapsed: Specify if the new form should be expanded or collapsed by default.
Next, go to the iXML editor and add a new text box by adding the following code:
<?xml version="1.0"?>
<!DOCTYPE ixml SYSTEM "http://www.ixmldev.com/schema/ixml.dtd">
<ixml>

<textbox id="test" label="Test" placeholder="Hello World" />

</ixml>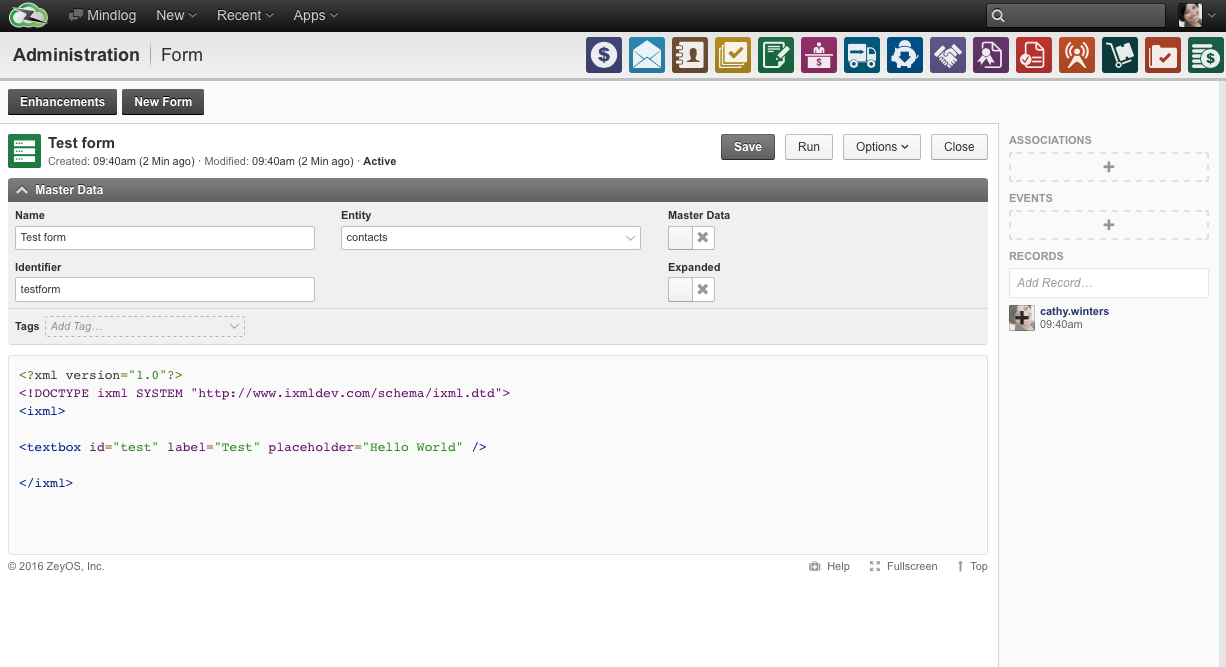
Notice in the screenshot that besides the form itself we had to set some additional form parameters:
- The name of the form (will be displayed in the panel header)
- A unique identifier for the form
- The entity where the form should be displayed (in our example "contacts")
- If the form panel should be expanded by default
- If the form should not have its own panel, but should belong to the master data panel at the top of the details view
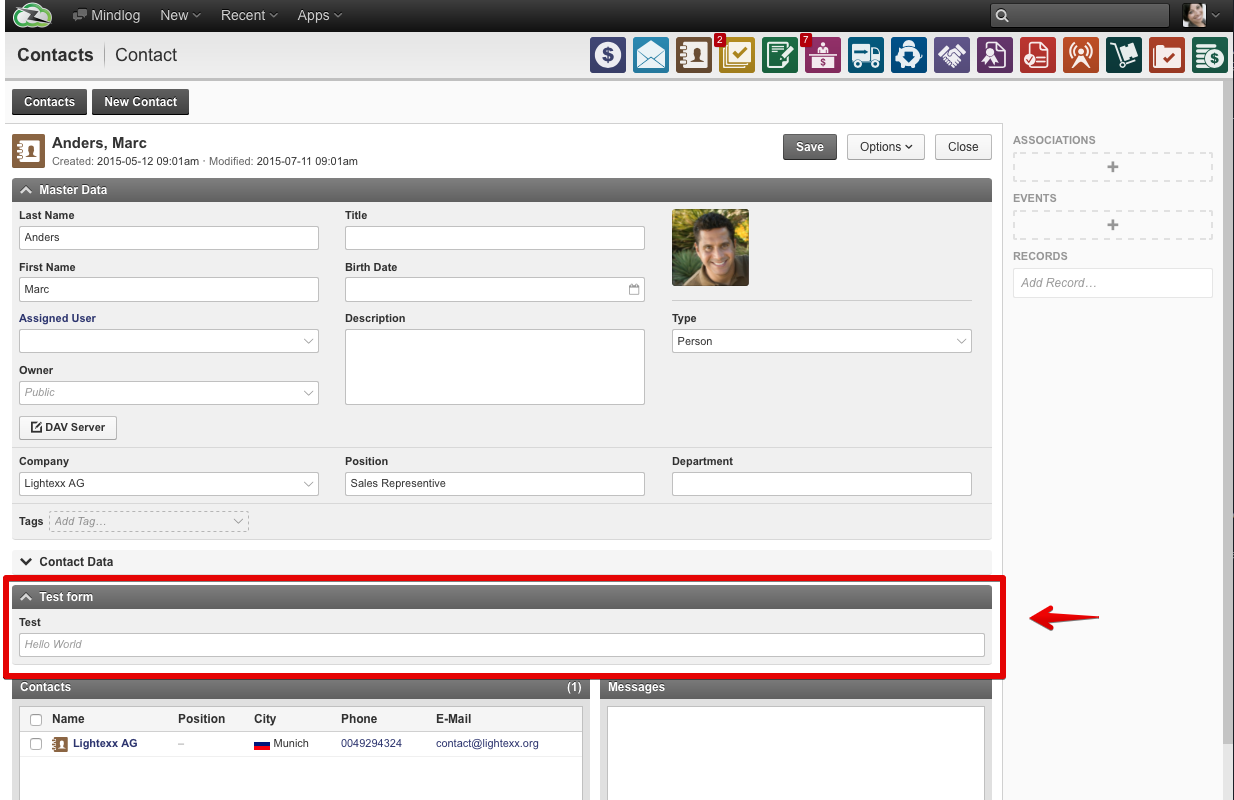
Once you click save, your form will be initiated automatically. If you now head over and open one of the elements of the entity you have selected, you will see that the form is already available.
In order to find the details about form fields you can check the "Forms" section in the iXML documentation. Here's a brief overview what's available:
hbox: A container to position form fields horizontally
Documentation: http://www.ixmldev.com/docs#hbox
Example:
<?xml version="1.0"?>
<!DOCTYPE ixml SYSTEM "http://www.ixmldev.com/schema/ixml.dtd">
<ixml>

<hbox>
    <textbox id="test1" label="Test 1" placeholder="Hello World" width="300" />
    <textbox id="test2" label="Test 2" placeholder="Hello World" width="300" />
</hbox>

</ixml>
vbox: A container to position form fields vertically
Documentation: http://www.ixmldev.com/docs#vbox
Example (combined with a hbox):
<?xml version="1.0"?>
<!DOCTYPE ixml SYSTEM "http://www.ixmldev.com/schema/ixml.dtd">
<ixml>

<hbox>
    <vbox>
        <textbox id="test1" label="Test 1" placeholder="Hello World" width="300" />
        <textbox id="test2" label="Test 2" placeholder="Hello World" width="300" />
    </vbox>
    <vbox>
        <textbox id="test3" label="Test 3" placeholder="Hello World" width="300" />
        <textbox id="test4" label="Test 4" placeholder="Hello World" width="300" />
    </vbox>
</hbox>

</ixml>
textbox: Text input box including validation
Documentation: http://www.ixmldev.com/docs#textbox
Example:
<?xml version="1.0"?>
<!DOCTYPE ixml SYSTEM "http://www.ixmldev.com/schema/ixml.dtd">
<ixml>

<!-- E-Mail address that need to end with "com" -->
<textbox id="email" label="E-Mail" type="email" pattern="/.*com$/" required="true" width="300" />

</ixml>
listbox: List items
Documentation: http://www.ixmldev.com/docs#listbox
Example:
<?xml version="1.0"?>
<!DOCTYPE ixml SYSTEM "http://www.ixmldev.com/schema/ixml.dtd">
<ixml>

<listbox id="test" label="Options">
    <listitem caption="Option 1">1</listitem>
    <listitem caption="Option 2">2</listitem>
    <listitem caption="Option 3">3</listitem>
</listbox>

</ixml>
Advanced forms: Using conditions to display/hide certain elements
Since forms are generated through iXML you can use all language features at your disposal, such as loops or conditions.
Let's take a look at a more advanced example:
<?xml version="1.0"?>
<!DOCTYPE ixml SYSTEM "http://www.ixmldev.com/schema/ixml.dtd">
<ixml>

<!-- Get the existing extdata values -->
<extdata:get var="extdata" entity="contacts" id="$ID" />

<hbox>
    <checkbox id="married" label="Married?">1</checkbox>
    <if value1="$extdata.married" value2="1">
        <textbox id="spouse" label="Spouse" width="300" />
    </if>
</hbox>
<for var="i" from="1" to="3">
    <hbox>
        <textbox id="child_$i$_firstname" label="Child $i Firstname" width="300" />
        <textbox id="child_$i$_birthday" label="Child $i Birthday" type="date" width="300" />
    </hbox>
</for>

</ixml>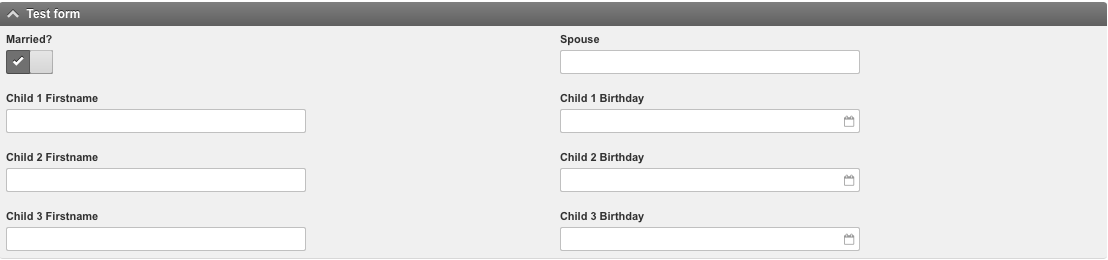
In this example you can see that the first fields "Children" are generated automatically using a for loop. Moreover, we are using an if condition to display the field "Spouse name" only if the checkbox "Married" is checked.
I hope those examples were helpful for you to get started! If you want more examples like this one, stay tuned for other episodes of our Hack your Business series.
