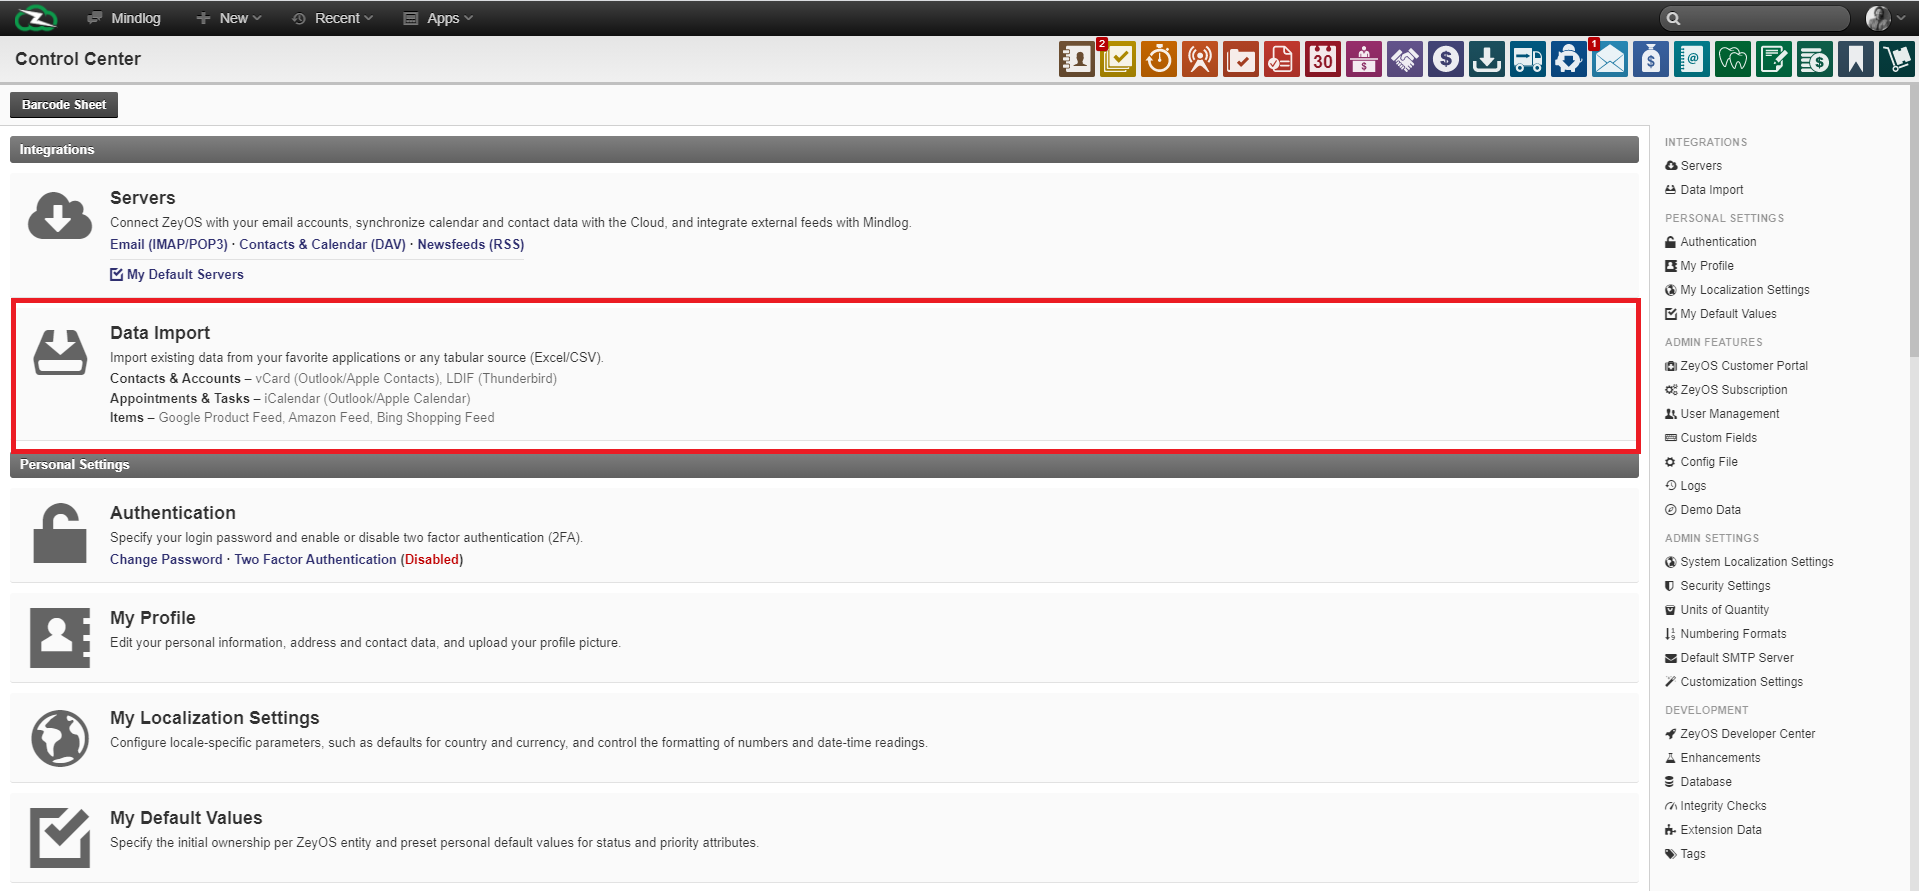
Importing Data
Use Data Import when records already exist in another system or spreadsheet and should be brought into ZeyOS in a controlled bulk process.
What This Page Is For
The import wizard helps you migrate master data and operational records without retyping them manually. It is especially useful during onboarding, data cleanup projects, or controlled mass updates.
Who Should Use It
This page is typically used by administrators, migration owners, or power users who understand both the source file and the target entity in ZeyOS.
What You Can Import
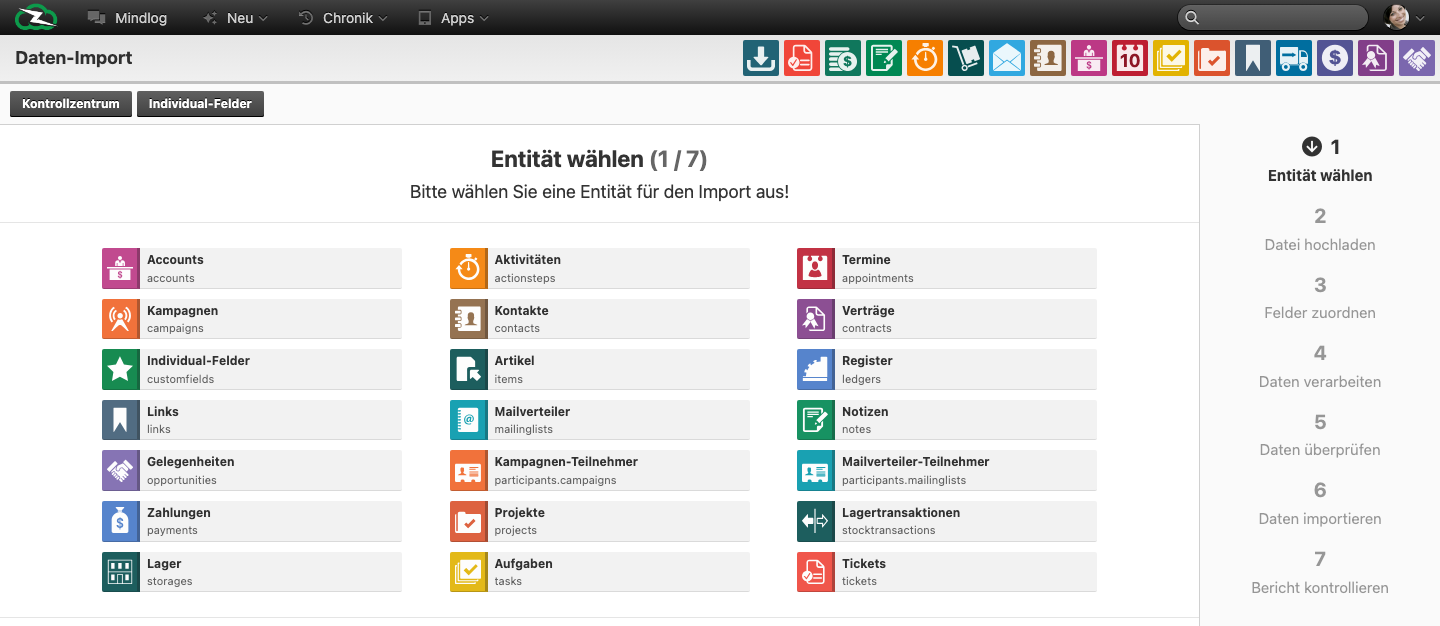
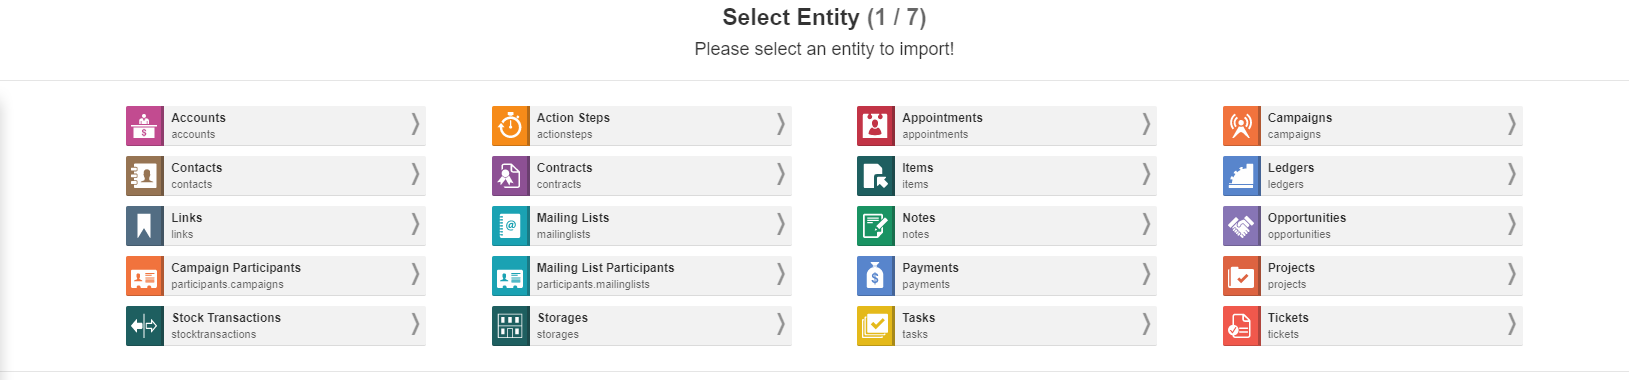
The live wizard offers a broad range of target entities, including:
- Accounts and contacts
- Appointments and tasks
- Campaigns, opportunities, and contracts
- Items, storages, and stock transactions
- Notes, links, projects, tickets, and payments
- Mailing lists and mailing-list participants
- Custom fields and other advanced entities used by administrators
What You See on the Page
The wizard is organized into seven numbered steps:
- Select entity
- Upload file
- Map fields
- Process data
- Review data
- Import data
- Check report
This structure makes the workflow explicit and gives you several opportunities to validate the import before data is written to the system.
Recommended Workflow
1. Prepare the source file
- Remove duplicate columns.
- Normalize date, number, and status values.
- Decide which ZeyOS entity should receive the data.
- Confirm that required reference data already exists, for example owners, groups, tags, or related accounts.
2. Select the target entity
Choose the entity carefully because it determines which fields and validations will be available in the next steps.
3. Upload and map the file
Upload the file and match each incoming column to the correct ZeyOS field. Skip columns you do not need. Use defaults where every imported row should receive the same owner, tag, or status.
4. Process and review the preview
Use the preview and validation steps to identify formatting issues, wrong field mappings, or incomplete reference data before the final import.
5. Run the import and check the report
Only start the final import once the preview is correct. After completion, review the report so you know which rows succeeded, were skipped, or need correction.
Best Practices
- Import one entity at a time where possible.
- Import master data before transactional data that depends on it.
- Keep a copy of the source file and mapping notes for repeatable imports.
- Test the workflow with a small sample before importing a full production file.
Related Topics
- Servers - Use servers for continuous integration-style synchronization, not one-time imports.
- Custom Fields, Tags, and Data Extensions - Create required custom fields before importing values into them.